If you don’t find the answer to your question here below please email us on support@smartmessages.app and our team will do our best to assist you.
How to report a bug?
To report a bug from inside the app: just go to menu ≡, then "Report a bug".
There is an option to take a screenshot and attach it to your bug report.
No bug to report and you want to contact us?
If you don’t have any bug to report but you want to communicate with us please send us an email on support@smartmessages.app
Why do I need to accept to set Smart Messages as my default SMS app? How can I change it? Is there a risk that I lose my messages?
It is a requirement from the Android operating system: Smart Messages needs to be your default SMS handler in order to properly operate. There is no risk of losing your messages and you can always change it later by reopening the app you wish to use instead and setting it as default again.
RCS (Rich Communication Services) : Read receipts and the typing indicator don’t work — How do I know when someone is typing or reads my message?
Because other SMS apps don't have the typing indicator and read receipts, your contacts also need to be using Smart Messages for those features to work with them. You can go to the app menu ≡ then 'Invite Friends' to invite anyone you want so they can install the app and then you will be able to see each other typing and when your messages are read. For privacy reasons, your contacts need to have these features enabled in their settings too.
To activate read receipts and typing indicator, just go to the app menu ≡ then 'Settings', then turn them on in the 'Rich Communication Features' section. This section is automatically turned on for most users, however in some cases it may require to manually verify your phone number.
One grey check mark means "sent" and two grey check marks means "delivered". Then, if read receipts are activated in your settings and on your contact's phone, the 2 grey marks will turn blue when he/she reads the message.
What is the “emoji prediction model”?
Emoji prediction is a feature that suggests relevant emojis based on the messages you receive, send, or the text of a message you are composing. The emoji prediction model combines an artificial intelligence that predicts emojis based on the emotion expressed in a message and a search engine that matches the last word you typed with the associated emoji. This model is only available in English for now and its weight is approximately 80MB, which is why we decided to only offer it as an optional download.
Example:
“I lost my wallet” → based on the emotion, the model will suggest: 😓
“I want a pizza” → based on the latest word, the model will suggest: 🍕
I have problems with notifications, the app doesn’t show me notifications when I receive a message, how can I fix it?
Notification visuals, sounds or vibrations are not activated for all apps by default, you may need to activate them for some particular app depending on your phone.
To activate them, you can go to your phone 'Settings' then 'Apps & notifications' and there you will be able to see if the notifications are enabled for Smart Messages (the green and white icon called “Messages” in the settings).
On some brands’ phones, the phone may block notifications to save battery life. It may also cause sending or reception delays, and scheduled messages may not be sent because of it too. Please go to dontkillmyapp.com for more explanations about this problem and possible solutions for your phone.
The same problem could also come from battery optimization apps that you may have installed, like Cleanmaster, CM Suite, CCleaner, Battery Doctor, Greenify, Amplify, etc., as they have the ability to block notifications. In that case, there may be an option in the battery optimization app to authorize certain apps to avoid the blocking. If available, please add Smart Messages to this authorized list and this should solve your issue.
I can see notifications but no new messages when I open them. I open the message from the app but the notification keeps showing. What’s going on?
Sometimes, the texting app you were using before installing Smart Messages interferes with message reception and may notify you of messages you already received through Smart Messages. This behavior is meant to confuse users in order to force you to open their app again and set it back as your default SMS app. In order to identify if it is the case, look closely at the icon displayed on each notification. Do they look exactly like the little chat bubble icon you can see on the logo of Smart Messages? If not, then it’s another texting app trying to trick you into opening it.
There is no sound when I receive a new message, how can I fix it?
Smart Messages does not have control over the sound volume. From the app, you can define the tune you would like to hear in general when you receive a message, or for any contact in particular. Please verify that the volume of the notification sound is turned on in your phone settings. From the app settings, you can also verify that the Default Notification Sound is properly set up and enabled.
If that doesn't help, please check that the notification sound is enabled for the conversation with the particular contact you can’t hear notifications from. Just go to your conversation thread with that person, open the menu on the top right corner, and verify that the toggle is turned on for the notification sound.
Finally, if none of the above worked, you can go to your Android settings > Applications > Messages (the one with the green and white icon), then go to the app notification settings, then click on "Advanced notification" and check that the sound is defined.
What is notification privacy and what are the options? Private notifications don’t work: I selected to show only contact names but it shows the message text.
In the app settings, you can choose between 3 privacy options that will determine the way your notifications are displayed. It applies both to your lock screen and when your phone’s screen is on:
- Show contact and message
- Show contact only
- Hide everything
Note that if the ‘Advanced Notification’ is turned on in your settings, then the notification privacy setting will only apply to your lock screen, because advanced notifications are designed to let you see the message and reply directly from the notification when your phone’s screen is on.
So if you want to hide the notification content when your phone is on, you need to disable the 'Advanced Notification' from the app settings.
What is the advanced notification? What’s the difference with regular notifications?
When your phone screen is turned on, this notification replaces the basic Android notification to allow you to type directly from the notification without having to leave any other app you are currently using. It shows you a reduced version of the conversation on the upper section of your screen, with the name and number of your contact, direct access to the contact details and phone call button, and the list of messages starting from the last message you received in that conversation. It gives you the option to reply directly from the notification, dismiss the notification, or you can use the mark as read button to dismiss the notification while marking the message as read.
The advanced notification displays on top of any other app or on your home screen, so you don't need to open the Smart Messages app in order to reply, keeping you always aware of your incoming messages and able to answer them very fast.
Can I send Flash SMS with the app?
Android does not allow to send class 0 SMS, because of their intrusive nature for the person who receives them. Flash messages are usually handled by carriers for emergency situations and other kinds of critical notifications.
What languages are supported by the app?
- Danish
- Dutch
- English
- Bulgarian
- Finnish
- French
- German
- Hindi
- Italian
- Japanese
- Korean
- Lithuanian
- Portuguese
- Russian
- Spanish
- Swedish
What are the Smart Replies? In which language are they coming?
Smart replies are the little text bubbles displayed at the bottom of your conversations to let you send automated replies when it makes sense, based on what your contact says. Today Smart Messages offers smart replies in English, and 15 more languages are coming soon. If not done already, you can easily enable the ‘Smart Replies’ feature in the app settings.
What is dark mode? How do I enable the black background color at night?
The dark mode feature displays light text on a dark background. You can enable it at any time although it’s particularly useful during night time.
You can manually turn it on:
- Go to the app menu ≡ then enable ‘Dark mode’ > ON
- You can also go in the menu ≡ then ‘Settings’ then ‘Dark mode’ > ON
You can also scheduled it:
Go in the menu ≡ then enable ‘Dark mode’ or go in the menu ≡ then ‘Settings’ then ‘Dark mode’ then click on ‘Manual’ and choose ‘Automatic’ instead, and there you can set your own time schedule or click on sunset/sunrise to have the dark mode follow the sunset/sunrise times in your region.
How does dual SIM cards work? Does the app support three or more SIM cards? How do I switch between SIM cards?
Smart Messages supports switching between two SIM cards for phones that have a dual SIM card compartment, allowing you to send and receive messages for both SIM cards in the same app. The app does not support 3 or more SIM cards yet.
To switch between SIM cards, long press the send button and select the SIM card you want to use as your default for sending. You will still receive messages from the other SIM card.
How to personalize the app? Can I change the appearance? Does personalization include the chat bubble colors? Can I set custom backgrounds?
You can personalize all your conversations at once, or you can personalize any given conversation separately. In order to personalize all the conversations at once, just go to the app menu ≡ then 'Settings', then ‘Change appearance’:
- The first tab that comes preselected on the top left side of the tab selector, represented by a paint brush icon, allows you to change the background theme and button theme color. Choose any predefined color by swiping horizontally on the color circles, or you can define a custom color using the color picker then clicking on ‘Apply’.
- Pressing the top middle button gives you the ability to change the background color, choose any predefined background picture by swiping right to left then clicking on ‘Apply’, or choose a picture from your own picture library.
- The last top right button with the chat bubble icon allows you to choose a color for the sender and/or receiver chat bubbles then click on ‘Apply’. To remove the personalization click on “reset”
You can personalize a specific thread: you can go to a specific thread contact then click on the 3 dots on the top right corner of the screen the ‘Change appearance’ and follow the same step same mentioned previously
The app says I have problems with my APN settings, how can I fix it?
APN settings are the settings your phone uses to send and receive MMS messages. If they are not set correctly, you can search online the APN settings for your carrier and try to apply them manually: search for keywords "APN settings" + your mobile carrier name (AT&T, Verizon, Orange, Vodafone, Telefonica, O2, etc.). We also recommend you to read the following article which explains how you can change your APN settings: https://www.androidcentral.com/what-apn-and-how-do-i-change-it
Sometimes though, all you need to do is to restart your phone, because the system may have trouble re-initializing APN settings and a fresh start could solve the issue.
Why can’t I send or receive messages? Can you help me troubleshoot the issue?
Message sending and reception issues can have different causes. Below are the most common problems with solutions to fix them:
- First, because it is an SMS app, Smart Messages requires a SIM card (or an e-SIM) to send and receive messages, so make sure there is one in your phone and that you have enough credit/units on your carrier plan to send messages.
- If you don’t receive messages from specific contacts, please verify that these contacts are not marked as spam or in your blocklist.
- If you previously used Google Messages or Samsung Messages, you may not be properly disconnected from their chat system. In this case, you need to disconnect it: open the Google Messages app (the one with the blue chat bubble icon) or Samsung Messages, set it as default again, then go to 'Settings', then 'Chat features', and if it shows 'Status: "Connected"', then switch it off by pressing the "Enable chat features" option. Once this is done, you will need to restart your phone in order to force the chat connection to unsubscribe, which usually takes a few minutes. Then you can safely return to Smart Messages.
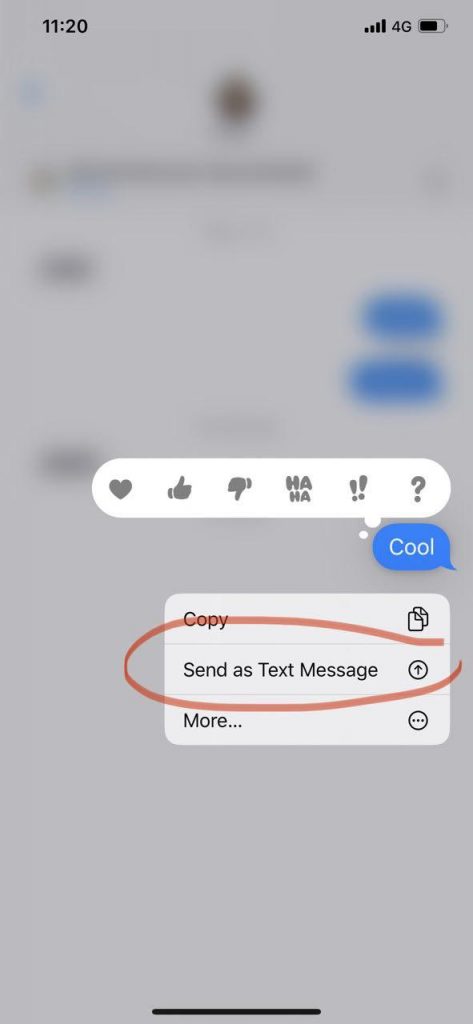
- If your contacts are writing to you from an iPhone and you had an iPhone yourself before using an Android phone, then the same interference issue might occur as with Google Messages and Samsung Messages. To solve this problem, you need to ask your contacts who use an iPhone to send you the message again as an SMS rather than iMessage format: they need to long press on the last message they sent you that you didn't receive, and click on "Send as Text Message". Below is a screenshot for illustration.
- Another possible reason for message reception/sending issues are battery saving services or system memory cleaning apps such as Battery Doctor, Cleanmaster, etc. When possible, you need to add Smart Messages to their authorized apps list so they won't randomly kill the app when you are sending or receiving a message.
- Some phones come with a pre-installed battery saving service, you can find instructions for each brand here: https://dontkillmyapp.com
- If you can’t send or receive MMS (videos, pictures, audios):
- Verify that MMS messages are included in your mobile plan. Some carrier plans, especially the prepaid ones, don’t include MMS or only allow a limited number of them.
- Check that your APN settings are correct
- Verify that mobile data is enabled: although some carriers allow to send and receive MMS over WiFi, it is not the case with most carriers, who require that mobile data be activated in order to send and receive photos, videos, etc.
The mobile data used for MMS is usually included in your MMS plan so it will not impact your mobile internet data consumption. As for advanced messaging features, such as the typing indicator and read receipts, these consume very little data. However, when your mobile data is on, other apps have access to the internet and may have an impact on your mobile data consumption, so be aware about which apps consume data on your phone. You can limit data usage in your Android settings.
Other than the above common causes, there can be specific error messages when trying to send a message. Below are the most common ones:
- Error 34 (with Sprint): some Sprint customers have reported an error 34 when they try sending out messages to certain regions, and it is apparently a common problem that can not be solved at the application level. Check out the Sprint/T-Mobile community website for more details:
https://community.sprint.com/t5/Services-Archives/Error-Code-34-when-Texting/td-p/467941 - Error 97: SMS origination denied is one of the most common carrier errors when trying to send SMS messages. It can be fixed by either restarting your phone, or by clearing the cache of Smart Messages. Here’s how you can clear the cache of an Android app: https://www.howtogeek.com/355154/how-to-clear-app-data-and-cache-on-android-to-solve-common-problems/
Does this app support Apple iMessage? I can’t receive messages from iPhone users, how do I fix it? How can I receive a message from an iPhone on my iPad and my Android phone?
Unfortunately, Apple doesn't allow compatibility of iMessage with Android SMS apps. But they do offer compatibility with SMS and MMS messages. You can receive messages from iPhones if they are not sent in the iMessage format.
For that reason, you can't receive messages from an iPhone on both and Android phone and an Apple device. If you have been registered in one of your contact’s iPhone as an iMessage user, you will only receive their messages on your registered iMessage devices, like your iPad.
If this is the case, you will need to decide on which device you want to receive your messages from these contacts. If you want to receive them on your Android phone, then you need to turn off your iPad, Macbook or other iMessage connected devices for a while, and ask your friends who are using an iPhone to then send you a text message instead of an iMessage (they need to long press any failed message to you on their iPhone and press “Send as text message”). Your phone number will then be updated on the iMessage system and you will start receiving their messages as SMS or MMS.
I can’t send messages to a short number / premium number. How can I fix that?
Short numbers, which are also called "premium-rate numbers", are phone numbers for which an extra charge is assessed to the caller, and billed by your carrier.
More details here: https://www.infobip.com/glossary/premium-sms-number
If you have trouble sending a message to a short number, the problem could come from your phone settings: the 'send premium text message' flag may have been set to 'never', so please locate the option in Android Settings > App Manager and set it to allow. You may also find this option in Android Settings > Apps > (menu in the top right of the screen) > Special Access.
Also, to protect you from extra charges, some mobile carrier plans don't include premium numbers, especially when it's a prepaid plan. That would be the reason why you can see an error message at the bottom of the screen when trying to send. Please contact your mobile carrier if you need more details about such limitations.
Can I send a message outside the country without using data?
Smart Messages is an SMS app, so it uses your carrier plan. If you send a text message it won't use your phone data, and if you send an MMS (image, video, audio), it will use your MMS plan, which usually requires that you have mobile data enabled, but it should not tap into your internet data billing as MMS data is separate from your internet data plan.
If you send a message to someone outside the country, you may also need to check that your carrier plan includes sending messages to this country. Your carrier may charge you extra for sending to this country.
How to create a group chat? How to send messages in bulk?
To start a group chat, just to start a new message and add your contacts phone numbers in the destination field "To" on the top of the screen.
When creating a group message conversation, by default, the “Grouped (MMS)” option is selected, which means that you are only sending your message as a single MMS message that will be delivered to all the selected contacts. Each recipient will be able to see who else is part of the group and reply to all.
If you prefer to send individual messages to each person in the group, you can select the “Multiple (SMS)” option instead. This way, the message will be sent in bulk, as multiple SMS if it only consists of a short text message, and your recipients won't be able to see who else the message was sent to.
The option to switch between "Grouped (MMS)" or "Multiple (SMS)" is located on the top right corner of your screen. If you want to apply the "Multiple (SMS)" option to all your groups, just go to the app menu ≡ then 'Settings' then turn off 'Group Chat (MMS) by default'.
What is the “group chat by default” option in settings?
When selected, this option will start any group conversation as “Grouped (MMS)” by default, although you still have the option to make it a “Multiple (SMS)” if you prefer to send bulk SMS.
I can’t send messages to a group, how can I fix it?
When creating a group chat, simple SMS are turned into MMS in order to be delivered to everyone at once, so if you want to be able to use group chats, you need to make sure your APN settings (MMS configuration) are properly configured in your Android settings.
How can I record and send a voice message?
When you are inside a conversation thread, just press and hold the microphone button on the bottom right side, next to the text input area. Speak while you are holding the button and then release the button, the voice message will be sent.
If you want to cancel the message while recording it, just swipe left to “Slide to cancel”
Can I make a speech-to-text message?
The microphone of Smart Messages is only to send voice messages, it does not perform speech-to-text transcription, but you can use a keyboard that has this feature if you want. Here are a couple apps you can use:
- Gboard keyboard (Google): https://play.google.com/store/apps/details?id=com.google.android.inputmethod.latin
- SwiftKey keyboard: https://play.google.com/store/apps/details?id=com.touchtype.swiftkey&hl=en
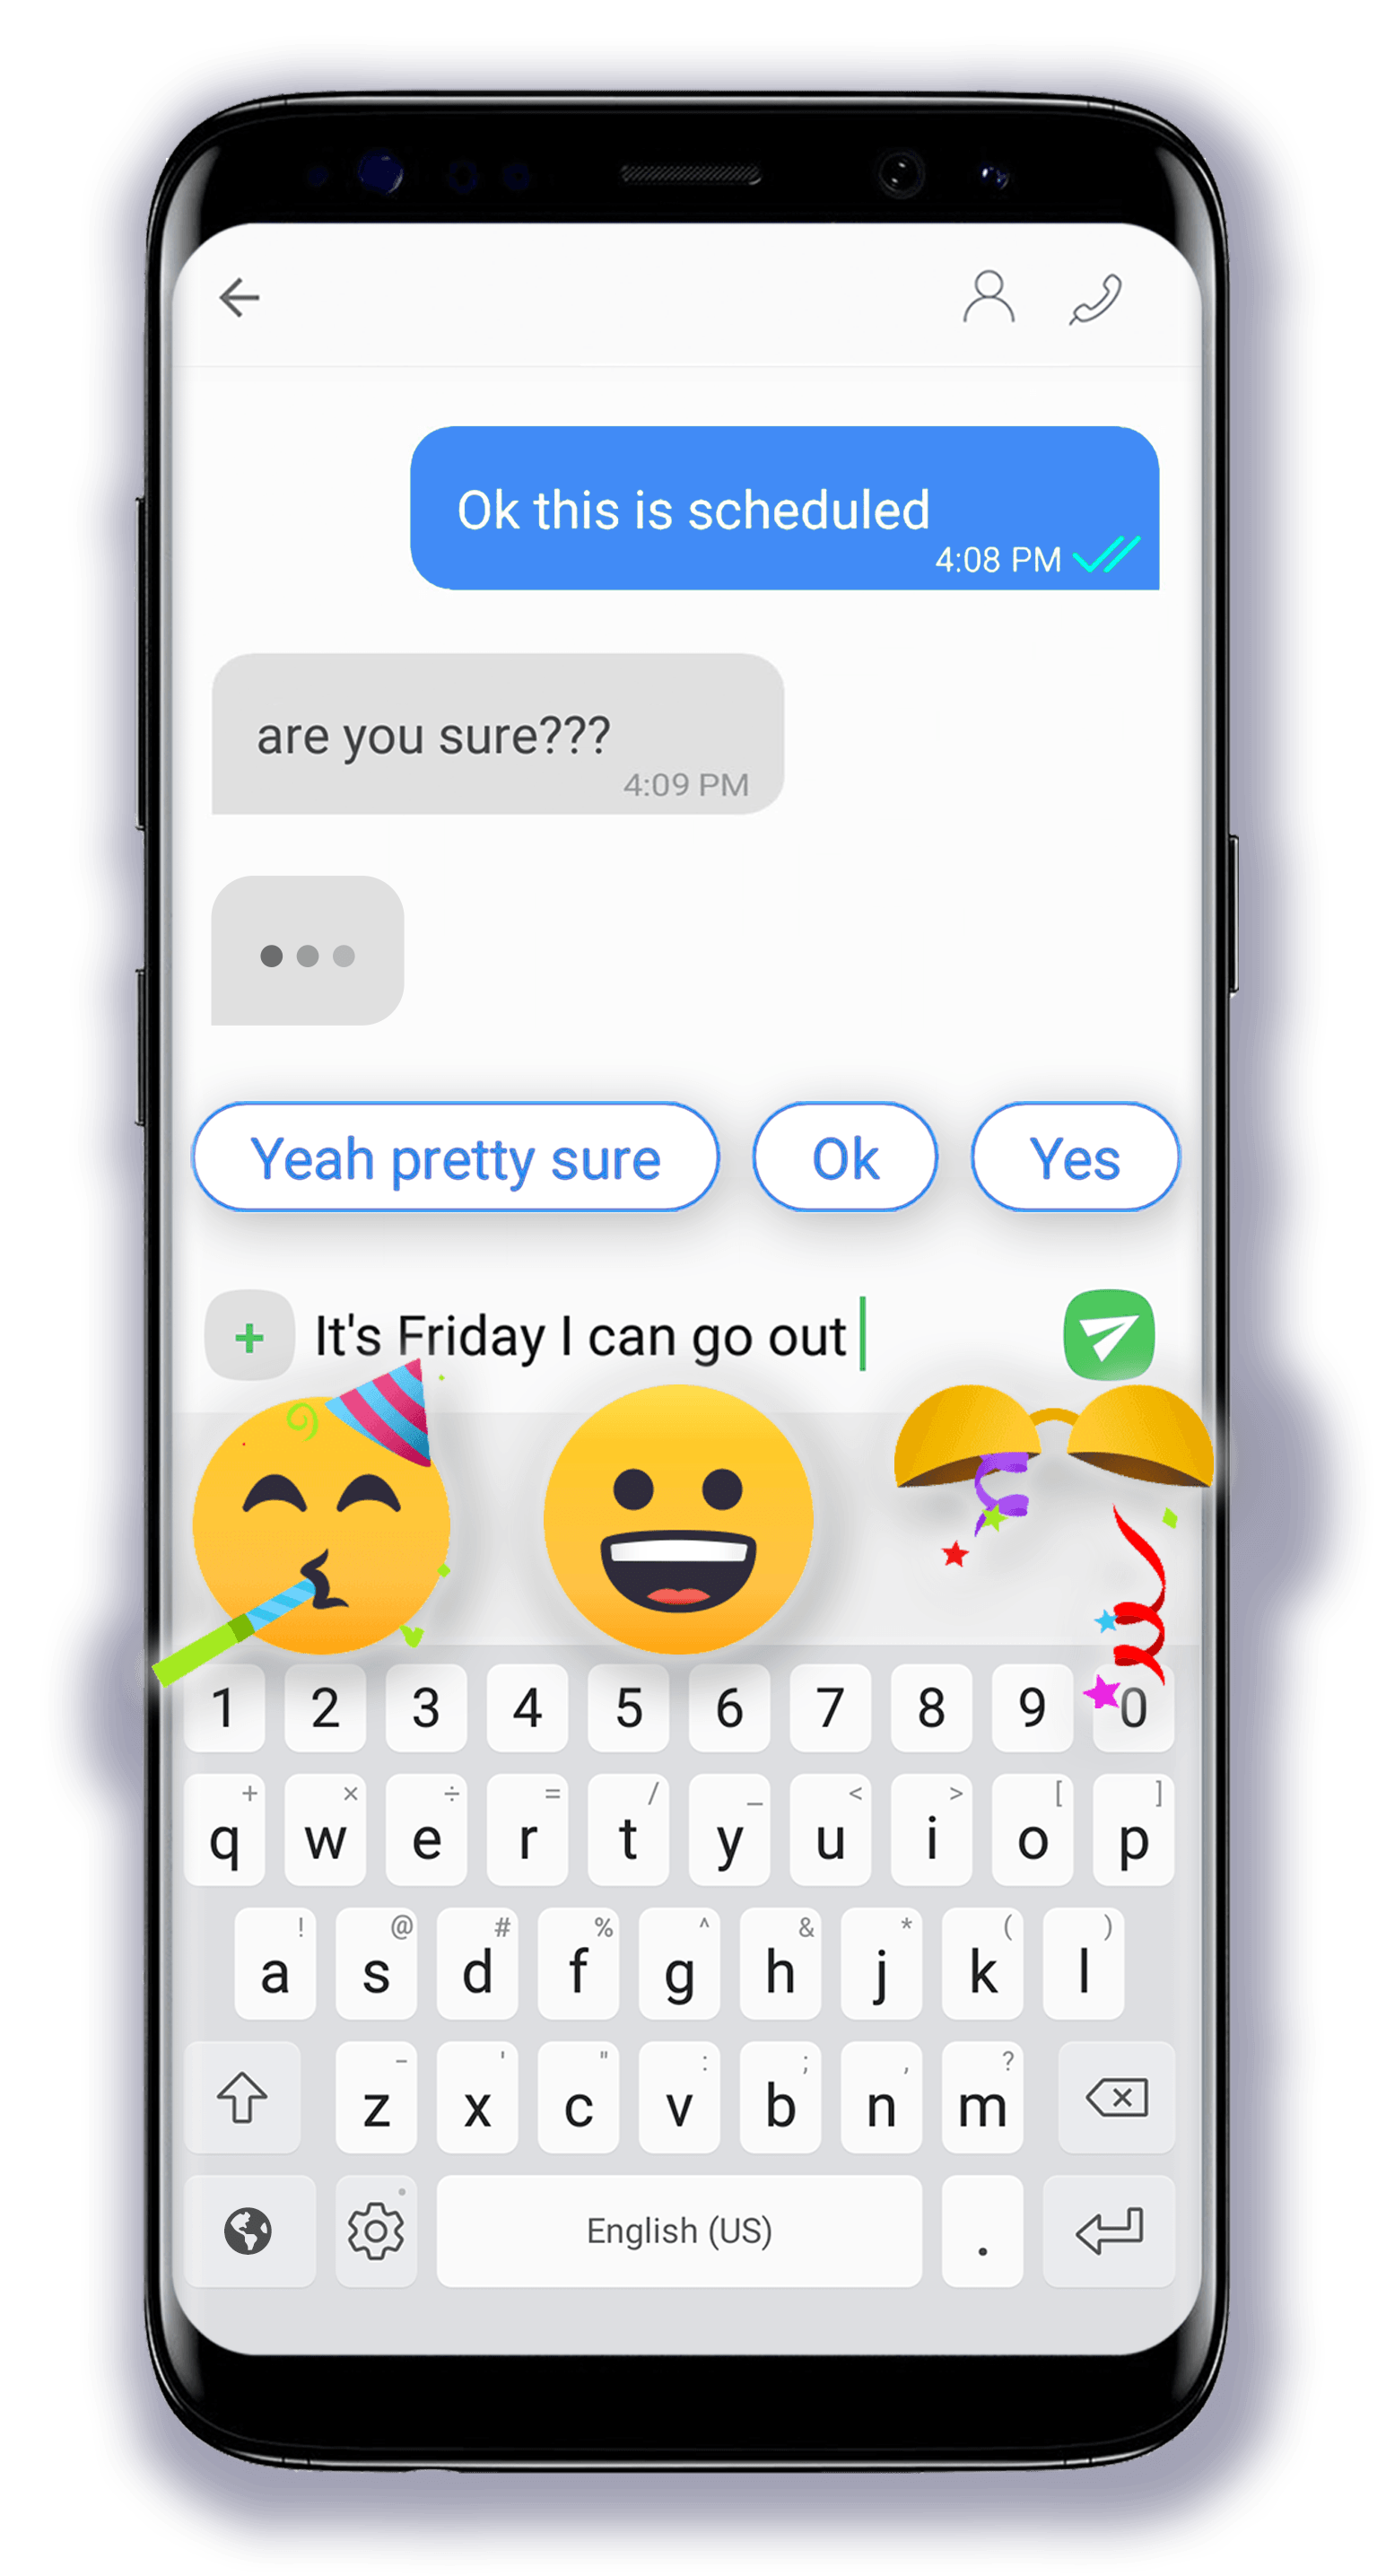
Can I schedule a message for later?
You can schedule a message to postpone the sending at any given date and time. Before sending your message, instead of pressing the send button, open the conversation menu ⋮ on the top right corner of your screen and press "Schedule message", then select a date and time.
Warning: a scheduled message can only be sent if the phone is turned on.
Can I add a delay before sending a message?
Yes, you can add a short delay before sending. In the app settings, you can select ‘Delay before sending message’ and set a value ranging from ‘No delay’ to up to 10 seconds. Such delay will allow you to cancel any message you sent before the delay expires by pressing the little cross button next to the text input area.
How can I send an emoji, GIF or sticker?
You can press the emoji symbol on the left side of the text input area, and then on the bottom of the emoji keyboard, you have three options: emojis, stickers and GIFs. When you press any of these options, you will see a collection of emojis, stickers and GIFs that you can send. When you are there, you can also press the small magnifying glass icon to search emojis, stickers and GIFs by keywords.
How can I change the emoji font?
If you want to change how your emojis look, you can go to the app settings, then choose the emoji font you want to use. For now you have the choice between JoyPixels, which is the default emoji font in Smart Messages, and Google, which is the default Android emoji font. We plan to add more emoji fonts in the future, but we need to make sure that we comply with intellectual property rights before doing so.
How can I delete one or more messages?
To delete one or more messages, long press on the first message that you wish to delete, you will see contextual options displayed, then select additional messages that you want to delete, and finally just press on the tiny trash can button to delete the selected message(s).
How can I delete an entire conversation with one or more contacts?
To delete one or more conversations, from the main view of the app, where you can see the list of all your conversations, long press on the first conversation thread that you wish to delete, you will see contextual options displayed, then select additional conversation threads that you want to delete, and finally just press on the tiny trash can button to delete the selected conversation(s).
How can I copy-paste a message?
For copy-pasting, just long press the message(s) that you wish to copy, and you will see contextual options displayed. Then press the double-page icon to copy the selected message(s) and finally long press the text field where you want to paste it and press "Paste".
At the moment, the feature allows you to copy and paste the full message, not just a selected portion of it, but this additional feature is on our roadmap so it will also be possible in the future.
How can I share a message to external apps? How can I share an image, video or audio?
To share one or more messages through any other app installed on your phone, long press on the message(s) or media that you wish to share, and you will see contextual options displayed. Then just press on the button represented by three dots attached with two bars, to share the selected message(s), and select the app you want to share the selected message(s) to.
How can I forward a message to other contacts? How can I forward an image, video or audio?
To forward one or more messages, long press on the message(s) that you wish to forward, and you will see contextual options displayed. Then just press on the arrow button to forward the selected message(s) to any contacts.
How can I pin a thread/contact/chat to the top of my conversations list?
To pin one or more thread/contact(s) to the top of your conversations list, long press on the thread that you wish to pin, and you will see contextual options displayed. Then just press on the pin icon to move the selected thread/contact(s) to the top of the list and keep it there
How can I archive or unarchive a conversation?
To archive any conversation/thread/contact, just long press the conversation to display contextual actions and press the little archive box button with an arrow inside pointing to the bottom. It will move the entire conversation thread to archives. You can see all your archived conversations by pressing the “Archives” option from the app menu ≡.
When you are in archives, you can restore any archived conversation to chats by long pressing it and pressing the unarchive button, represented by an archive box with an arrow inside pointing to the top. You can also unarchive any conversation from inside the conversation view, by pressing the conversation menu ⋮ on the top right corner of your screen and pressing “Unarchive”.
How can I block someone? How do I remove someone from the blocklist?
To add someone to your blocklist, just go to the conversation with that person and from the conversation menu ⋮ press “Block contact”. If you don’t have an existing conversation with that person, you can go to the app menu ≡ then 'Settings', then ‘Blocklist’, then add the contact or the phone number you want to block. From there, you can also unblock someone if you want: just press the contact you want to unblock and press the “Unblock” button on the top right corner.
When someone is blocked, you will not receive their messages for as long as they are blocked. If you think this is too radical, you can add the person to your spams instead. If you add someone to spams, you will not get notified when receiving their messages, and their messages won’t be deleted by default, but you can set up deletion after 7 or 30 days if you want.
How can I mark or unmark a message/conversation/contact as spam?
To mark any conversation/thread/contact as spam, just long press the conversation to display contextual actions and press the little circular forbidden sign button. It will move the entire conversation thread to spam. You can see all your spam conversations by pressing the “Spam” option from the app menu ≡.
When you are in spams, you can restore any spam conversation to chats by long pressing it and pressing the unmark as spam button, represented by a check mark. You can also unmark as spam any conversation from inside the conversation view, by pressing the conversation menu ⋮ on the top right corner of your screen and pressing “Unmark as spam”.
After adding contacts to spams, you won't be notified when receiving new messages from them. By default the new messages will stay there indefinitely but you can set up your spam box to automatically delete messages after 7 or 30 days. You can configure this option from the app menu ≡ then ‘Settings’ > ‘Clear spams’.
What is the ‘Magic Cards’ feature? Why do I see stars glitter on my text bubbles?
When a phone number, one-time code or internet address has been detected, you can tap a message marked with a little star glitter icon and you will see Magic Cards in the form of clickable contextual actions allowing you to call the number, copy the code, or even display the address on a map. The detection happens privately without storing any of your data. This feature is only available in English for now.
How do I mark as read a message? How do I mark them all as read?
When you receive a new message, a notification will pop up showing you the option to “Mark as read” the conversation from the last message you received.
When you are in your conversations list and you have one or more unread messages, you can open the app menu ≡ and press “Mark all as read”. This menu option is only visible to you if you have unread messages.
Does the app have a desktop or web version that we can use for texting on a computer?
Only a mobile version is available for now, but this is something we are considering for the future.
How can I remove ads?
We offer an option to disable ads in exchange for a small subscription fee. To subscribe, just go to the app menu ≡ and press “Remove ads”.
I see large ad popups on my screen, is this you?
No. We don’t show any other ads than the discrete little ones you’ve seen nicely integrated in the app’s user interface, and we will never display disruptive popups nor any other kinds of ads that could hurt the app usability. For now, ads only appear below the search bar on top of the main view of the app, where you can see the list of all your conversations. We may show ads in other places in the future but we will always make sure that it doesn’t affect your experience negatively.
I can’t add new contacts, my contact names aren’t showing anymore, I can only see the numbers, how can I fix that?
In your Android settings, the 'Contacts' permission has been denied for “Smart Messages”.
To enable this setting, please go to 'Apps & notifications' from your phone settings then select the 'Messages' app with the green and white icon, then click on 'Permissions', then click on 'Contacts' then 'Allow'.
Or you can also follow this path: long press on Smart messages icon then click on the small 'i' or “App info” on top right corner then click on 'Permissions', then click on 'Contacts' and 'Allow'.
How can I send a large file or a PDF document?
This feature request is on our roadmap and for now we recommend you to share Dropbox or Google Drive links.
How can I back up or synchronize my messages?
This feature request is on our roadmap and for now you can use the “SMS Backup and Restore” app for that particular task.